 PLAY NOW

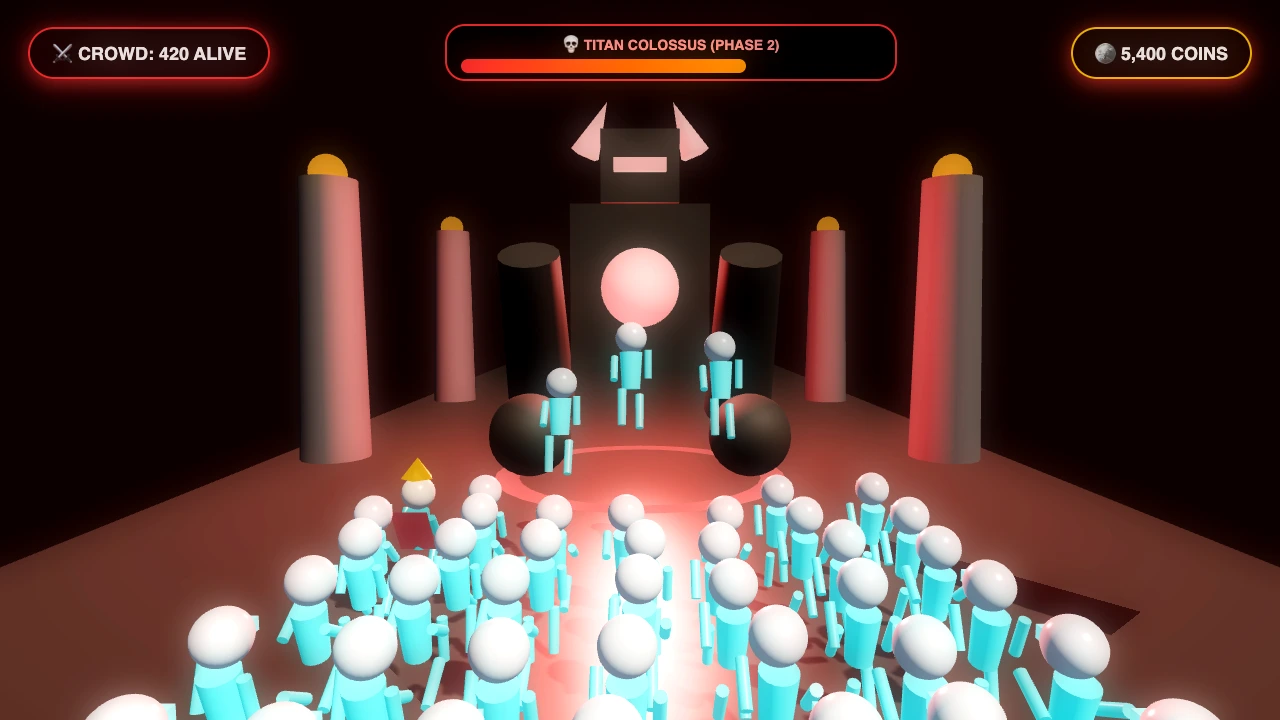
1. Boss Arena Architecture: The Rules of Engagement
- Forward Runway Deceleration: Your crowd's forward speed decelerates from $v_z = 28.0\text{ units/sec}$ down to a controlled approach velocity of $12.0\text{ units/sec}$, expanding the tactical engagement window to approximately 4 to 6 seconds.
- Automatic Swarm Projectiles: Every active runner automatically locks onto the boss's central chest core, discharging energy bolts at a rate of 5.0 shots per second.
- Lateral Runway Freedom: The track widens slightly to $12.0\text{ meters}$ with raised steel barriers, giving you ample room to orbit the perimeter while avoiding boss attacks.
- The Defeat Explosion: When the boss's HP bar empties, all active attacks and projectiles evaporate instantly, and your surviving crowd surges forward into the victory portal.
2. Titan Golem: The Ancient Stone Colossus (Biomes 1 & Early Stages)
Attack 1: Overhead Double-Fist Slam
- Telegraph Cue: The Golem raises both massive stone fists high above its head, illuminating the track surface with an expanding circular yellow warning decal centered at $x = 0.00$.
- Telegraph Duration: $1.20\text{ seconds}$.
- Impact & Danger Zone: Crushes everything within a 4.2-meter radius, sending out a radial dust shockwave.
- Optimal Counter-Tactic: Steer your swarm to the far left or far right curb ($x = \pm 4.5$). The shockwave dissipates completely before reaching the outer meter of the runway.
Attack 2: Ground Stomp Shockwave
- Telegraph Cue: Lifts right foot while vibrating the screen.
- Telegraph Duration: $0.85\text{ seconds}$.
- Impact: Sends a horizontal shockwave bar rolling down the runway toward your swarm.
- Counter-Tactic: The shockwave bar possesses a 1.5-meter gap located near the track edges. Align your crowd with the gap to let the wave pass harmlessly through.
3. Mecha Destroyer: The Cybernetic War Machine (Biome 2 & Neon Highway)
Attack 1: Horizontal Laser Sweep
- Telegraph Cue: Dual red laser targeting beams paint the track asphalt for 750ms before firing.
- Execution: Sweeps a high-intensity energy beam horizontally from left to right across the entire track breadth in 450ms.
- Optimal Counter-Tactic: Never try to outrun the beam to the right! Instead, dash toward the left curb. As soon as the beam fires and passes the left flank, slip into the wake behind the beam. The cutting plane cannot strike backward.
Attack 2: Plasma Gatling Barrage
- Telegraph Cue: Twin gatling barrels spin up with a high-pitched whine.
- Execution: Fires a dense stream of 12 plasma bolts aimed directly at your swarm's centroid.
- Counter-Tactic: Continuous lateral movement. Keep moving at a constant lateral speed of $3.0\text{ units/sec}$; the gatling tracking algorithm lags behind moving targets, causing all 12 bolts to hit the asphalt behind your trailing flank.
4. Molten Colossus: The Volcanic Juggernaut (Biome 3 & Magma Foundry)
Attack: Magma Mortar Volley
- Telegraph Cue: The Colossus leans backward and launches three molten lava cores from its back exhaust vents.
- Telegraph Duration: $1.10\text{ seconds}$ airtime.
- Impact: Three large circular fire puddles erupt on the runway, lingering for $2.5\text{ seconds}$. Stepping into a puddle instantly vaporizes runners at a rate of 20 units per tick.
- Optimal Counter-Tactic: Observe the red trajectory landing decals. Thread the clean asphalt corridor between the circles while maintaining steady forward projectile pressure on the titan's glowing chest vent.
5. Cosmic Overlord: The Deep-Space Singularity (Biome 6 & Apex Stages)
The Regenerating Plasma Barrier (1,000 HP)
The Overlord is protected by an elliptical energy shield that absorbs all incoming projectile fire. If you fail to inflict continuous DPS, the shield begins regenerating at a rate of $200\text{ HP/sec}$ after a 2-second ceasefire. You must maintain an unbroken stream of bolts to shatter the barrier and expose the core hull.
Attack: Singularity Vortex Pulse
- Telegraph Cue: The Overlord's chest core opens, revealing a miniature swirling black hole that pulls your runners inward toward the centerline ($x = 0$).
- Execution: While your swarm is being dragged inward, twin orbital lasers fire down both outer curbs.
- Counter-Tactic: Do not panic and pull against the gravitational pull too hard, or you will steer directly into the orbital laser beams! Maintain position at $x = \pm 2.0$—the golden safe zone between the vortex event horizon and the outer laser cutting paths.
6. Master Boss Strategy Reference Table
7. Summary: The Golden Rules of Zero-Casualty Boss Combat
- Never Melee Ram: Protect your runners for the Rainbow Staircase; rely on ranged projectile DPS.
- Compress into Spearhead: Avoid wide formations that suffer from raycast dispersion and angle falloff.
- Respect Telegraph Decals: When track decals flash red, execute immediate lateral evasion without hesitation.
- Maintain Continuous Fire: Prevent late-game bosses from triggering shield regeneration cycles.
8. The Mathematics of Crowd DPS Convergence vs Collision Attrition
Every active runner in your swarm discharges energy projectiles at a constant frequency $f = 5.0 ext{ Hz}$, with each bolt delivering $1.0$ point of damage. Thus, the total instantaneous theoretical output is:
Against a 2,000 HP Mecha Destroyer, a crowd of 200 runners dishes out $1,000 ext{ DPS}$, obliterating the titan in exactly $2.0 ext{ seconds}$. Contrast this with melee collision: ramming the same boss with your crowd eliminates 200 living runners ($200 imes 10 = 2,000$ impact damage), leaving you with 0 runners and instantly ending your run!
Conclusion: Ranged fire delivers identical damage over a tiny 2-second window while preserving 100% of your army for the lucrative Rainbow Staircase ascent.
9. Boss Enrage Timers & Dynamic Threat Escalation
- Attack telegraph windows drop by 50% (e.g., Mecha Destroyer laser targeting shrinks from 800ms to 400ms).
- Ground shockwave danger radiuses expand by 40%, covering nearly the entire runway surface.
- The boss begins firing secondary homing missiles that track the player's lateral movements.
To avoid triggering the enrage timer, always enter boss arenas with at least 80 runners, ensuring your baseline DPS exceeds $400 ext{ DPS}$ and defeats the colossus within 3 to 5 seconds.
10. Frame-by-Frame Encounter Walkthrough: Molten Colossus
[0.20s] Firing begins: 280 bolts × 5.0 Hz = 1,400 DPS.
[0.90s] Boss HP drops from 3,800 to 2,540. Colossus launches Magma Mortars.
[1.50s] Three red circular landing decals appear at z = 120m. Player steers to x = +3.2.
[2.10s] Mortars impact track surface. Swarm threads the clear curb pocket unharmed.
[2.71s] Boss HP reaches 0. Colossus collapses in volcanic explosion.
[2.75s] Surviving runners: 280 / 280 (100% survival rate). Multiplier secured!
11. Boss Encounter FAQ
Q: Can I jump over boss shockwaves?
A: No. Control Guys Count is a pure lateral ground runner without a vertical jump mechanic. All shockwaves must be evaded by steering laterally into designated curb gaps or perimeter safe zones.
Q: Do boss battles reward bonus gold coins?
A: Yes! Every defeated boss awards an immediate completion bounty ranging from 150 coins (Titan Golem) to 500 coins (Cosmic Overlord). This bounty is added to your collected stage coins before being amplified by the Rainbow Staircase multiplier!
12. Acoustic Telegraphs: Listening for Synthesized Web Audio Cues
- Overhead Fist Slam: Generates a descending frequency modulation sweep ( ext{Hz} o 220 ext{Hz}$) lasting ext{ms}$ prior to ground impact.
- Horizontal Laser Sweep: Emits an abrasive detuned square wave (,760 ext{Hz}$) with high resonance that pans across stereo channels from left to right, indicating the exact direction of the incoming beam.
- Singularity Vortex: Modulates a deep sub-bass oscillator ( ext{Hz}$) that throbs at a rate of .0 ext{Hz}$, alerting players to begin counter-thrusting against the gravitational pull.
Listening carefully with stereo headphones allows top-tier players to begin steering into evasive pockets before the visual telegraph decals even finish expanding on the screen.
13. Endless Gauntlet Boss Scaling: Dual Colossi Encounters
Defeating dual bosses requires a Divided Standoff Formation: holding the exact centerline ( = 0.00$) while your crowd's automated projectile fire splits evenly between both targets. Prioritize eliminating the Mecha Destroyer first, as its horizontal laser sweeps pose a lethal existential threat to your crowd flanks.