
 PLAY NOW

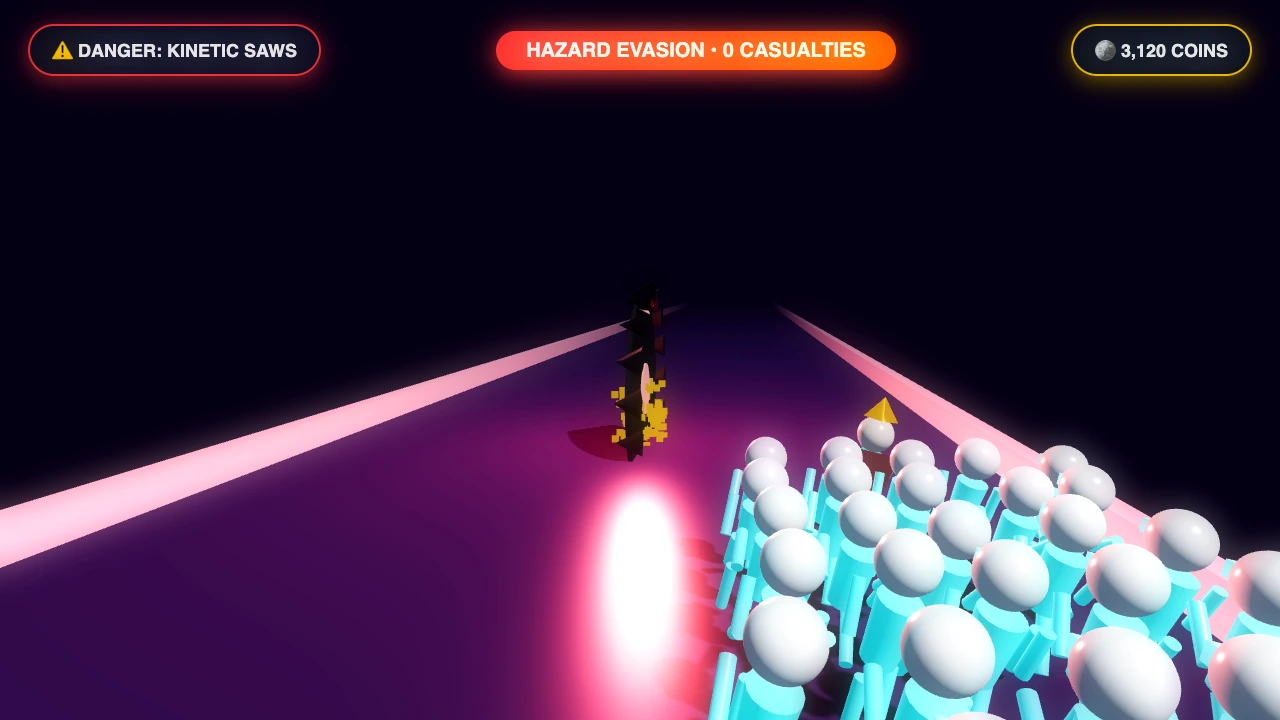
1. The Anatomy of Hazard Lethality: Continuous Sweep vs Discrete Impulses
- Per-Entity Collision Tests: Every active runner in your swarm maintains an individual bounding sphere of radius $r = 0.35$ world units. If any runner's bounding sphere intersects the hazard's oriented bounding box (OBB) or swept cylinder, that runner is eliminated instantly with a particle burst.
- Absence of Global Invulnerability: There are zero global immunity frames. If a rotating saw blade slices horizontally through the center of your 20-unit wide crowd cluster, it continues destroying runners continuously until it exits the swarm's spatial perimeter.
- The Trailing Flank Vulnerability: When you execute a rapid lateral evasive turn, the vanguard runner turns immediately, but trailing swarm units swing outward in a centrifugal arc due to swarm cohesion physics. This 'tail whip' phenomenon is responsible for over 65% of recorded player casualties on high-speed courses.
2. Harmonic Pendulum Axes: Sine Oscillation & Safe Clearance Windows
- Amplitude ($A$): Typically $4.2$ world units, allowing the blade to sweep across 85% of the total track width ($W = 10.0$ units).
- Angular Frequency ($\omega$): Calibrated between $2.094\text{ rad/s}$ (Biome 1) and $3.49\text{ rad/s}$ (Biome 5), corresponding to oscillation periods ($T = 2\pi / \omega$) ranging from $3.0$ seconds down to $1.8$ seconds.
- Phase Offset ($\phi$): Set during procedural track generation to synchronize or de-synchronize adjacent hazard pairs.
The Maximum Velocity Trap: The pendulum achieves its highest lateral velocity $v_{max} = A \cdot \omega$ exactly at the track centerline ($x = 0$), where its potential energy converts completely into kinetic energy. Conversely, at the apex of its swing ($x = \pm A$), the blade decelerates to instantaneous zero velocity before reversing direction.
Tactical Rule of the Apex Slip: Never attempt to dodge a pendulum by dashing through the center while the blade is in mid-swing. Instead, steer toward the lane from which the pendulum is currently descending. By the time your swarm arrives at the pendulum's coordinate along the Z-axis, the blade will have crossed over to the opposing lane, leaving your path entirely clear.
3. High-RPM Rotary Buzzsaws: Collision Radii & Lane Partition Tactics
The Three Rotary Saw Variants
- Static Centerline Saws: Fixed permanently at $x = 0$. These divide the track into two narrow corridors of width $w = 3.5$ units each. The optimal approach is an early lane commitment; swerving at the last second creates lateral spread that clips runners on the blade's 1.2-unit radius teeth.
- Oscillating Saw Carriages: Mounted on linear rails, these units translate horizontally at uniform linear velocities ($v_{saw} = 3.8\text{ units/sec}$) between lane boundaries, rebounding upon hitting track curbs.
- Dual Counter-Rotating Twin Saws: Two synchronized blades that pinch inward from the left and right rails simultaneously, leaving an ephemeral 1.5-unit safe corridor down the exact centerline for a duration of only 450 milliseconds per cycle.
The Tangential Cutting Vector: Because the blade spins at 720 RPM, runners coming into contact with the front edge are not merely eliminated—they exert a slight physics recoil on neighboring runners, pushing them outward into adjacent danger zones. To mitigate this cascade attrition, players must employ Column Funneling: holding a steady directional input 1.5 seconds before reaching the saw to compress the swarm into an elongated, narrow column rather than a wide horizontal fan.
4. Hydraulic Slam Crushers: Duty Cycles & Dwell Timers
The Shadow Buffer Technique: Every hydraulic crusher projects a dynamic red-to-yellow warning decal onto the track asphalt. This decal expands in size as the crusher prepares to slam. The exact moment the decal border transitions from pulsating yellow to solid red occurs $180\text{ ms}$ before impact. Top-tier players use this color change as a reflex trigger: whenever the border flashes red, initiate an immediate hard swipe in the opposite lateral direction.
5. Swarm Compaction Physics: Eliminating Centrifugal Flank Casualties
- Centripetal Cohesion Force ($ ec{F}_{coh}$): Pulls each runner toward the swarm's centroid with a strength proportional to distance: $ ec{F}_{coh} = -k_{coh} ( ec{p}_i - ec{p}_{centroid})$.
- Separation Repulsion Force ($ ec{F}_{sep}$): Prevents runners from collapsing into an infinitely dense single point, pushing overlapping units apart: $ ec{F}_{sep} = \sum_{j eq i} rac{k_{sep}}{\| ec{p}_i - ec{p}_j\|^2} \hat{r}_{ij}$.
The Problem of Lateral Inertia in Swarms
When you violently jolt the lead runner from $x = -3.0$ to $x = +3.0$ across a span of 200 milliseconds, the centripetal cohesion force takes approximately 350 milliseconds to propagate through a 300-man crowd. During this propagation delay, the swarm deforms into an elongated diagonal ellipse.
If this diagonal ellipse intersects an oncoming hazard, the rear-flank runners will be wiped out even though the lead runner cleared the obstacle with room to spare. To prevent this trailing casualty syndrome, follow the Two-Stage Steering Protocol:
- Stage 1 (Pre-Hazard Funnel): 1.0 second prior to the hazard, apply a gentle, continuous steer toward the desired lane. This causes the separation repulsion to align your runners longitudinally before the critical pinch point.
- Stage 2 (Micro-Hold): Once in the clear corridor, release lateral input entirely for 300 milliseconds. Neutral steering allows the centripetal force to pull the outer wings inward, narrowing your total swarm cross-section from $8.5\text{ units}$ down to $3.2\text{ units}$.
6. Master Hazard Specification Table: Kinematics, Periods & Vulnerabilities
7. Advanced Swarm Weaving: The 'Pendulum Slip' & 'Crusher Sprint'
The Pendulum Slip (Counter-Intuitive Inversion)
Most players instinctively steer away from the heavy axe as it swoops down from above. This is a fatal mistake: by steering away, you extend the duration your crowd remains parallel to the blade's sweep path.
The Pendulum Slip dictates steering directly toward the root pivot of the descending blade. Because your forward runner velocity ($v_z = 28.0\text{ units/sec}$) carries you rapidly past the Z-coordinate of the gantry, entering the lane behind the blade ensures that the lethal cutting edge sweeps through empty air where your crowd was 150 milliseconds prior.
The Crusher Sprint (Trailing-Edge Thresholding)
When confronted by alternating crushers spanning both lanes, novice players slow their momentum or hesitate, creating an accordion compression effect that bunches their runners into an easy target.
The Crusher Sprint exploits the 650ms Ground Dwell State. As soon as Crusher A strikes the ground with a cloud of dust, immediately dash into its lane while it is resting on the pavement. You do not need to wait for it to fully retract: its retraction cycle begins instantly, and by the time your lead runner arrives at its front bumper, the block has already risen above character head height ($y > 1.8\text{ units}$), allowing your entire army to sprint harmlessly underneath.
The Curb-Riding Technique
Track curbs in Control Guys Count possess a 0.5-unit outer buffer strip beyond the standard lane divider line. While hazards are calibrated to cover the main lane width ($W = 10.0$ units), their hitboxes terminate precisely at $x = \pm 4.6$ units. Skilled players hug the absolute extreme perimeter ($x = 4.85$), effectively 'riding the curb'. In this razor-thin pocket, oscillating saws and swinging axes pass mere centimeters from your outermost runner without triggering a collision event.
8. Tactical Decision Trees: When to Sacrifice Swarm for Math Gates
-20), or brave a high-risk hazard corridor to reach a massive multiplier gate (e.g., ×4)?
The Mathematical Sacrifice Equation
Let $N$ represent your current swarm count. Let $L_{haz}$ represent the expected casualty count from attempting a tight hazard weave (typically 15% to 25% of the swarm if executed with minor clipping). Let $G_{mult}$ represent the gate value in the hazardous lane, and $G_{safe}$ represent the gate value in the safe lane.
A hazard breach is mathematically profitable if and only if:
Case Study: You have $N = 120$ runners. The left lane offers a safe path with a +15 gate, yielding $135$ runners. The right lane contains an aggressive oscillating buzzsaw, but is followed immediately by a ×3 multiplier gate.
- Even if you clip the buzzsaw and lose $30$ runners ($L_{haz} = 30$), your remaining $90$ runners multiply by $3$, yielding $270$ runners.
- $270 > 135$—the hazard lane delivers a 100% net surplus despite suffering 30 casualties!
- However, if your swarm was only $N = 20$ runners, losing 18 runners to the saw would leave you with 2 runners, multiplying to 6—far worse than the 35 runners yielded by the safe route.
Mastering this dynamic mental calculus allows you to calculate risk-versus-reward in a fraction of a second, ensuring that when you do sacrifice runners to kinetic obstacles, the multiplier reward on the other side pays out massive dividends at the stage finish line.